


Usually, yes, but only if the full mounting system still has enough safety margin. The wall structure, mount rating, fasteners, and VESA pattern all need to support the new display.
Does your current wall mount look solid, yet the new monitor feels like a real step up in size or weight? That is exactly where upgrades can go wrong. The old screen may have come off cleanly, but the new one can add more stress, more reach, and less forgiveness. A careful check now can help you avoid sag, wobble, stripped anchors, or a cracked panel.
Start With the Real Question: “Same Holes” Where?

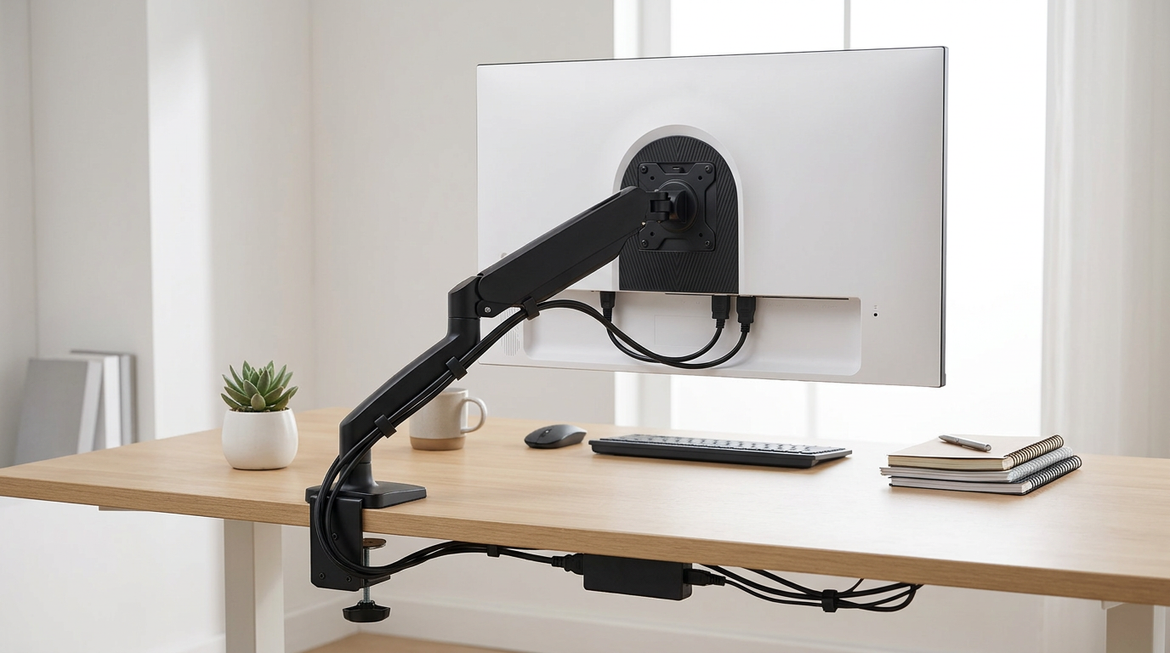
The first thing to separate is the monitor-side hole pattern from the wall-side holes. The monitor-side holes are the VESA pattern, usually about 3 x 3 in or 4 x 4 in on desktop displays, and those determine whether your new monitor physically attaches to the plate. The wall-side holes are the drilled points in the wall where the bracket or arm is anchored, and those determine whether the wall can safely carry the new load.
That distinction matters because a monitor can fit the same VESA plate and still overload the old wall mount. In practice, that is common with modern ultrawides and larger office displays. A 34-inch curved screen may not look dramatically bigger than a 27-inch flat panel, but its center of gravity often sits farther forward, which increases leverage on the arm and the wall. One source notes that heavy ultrawides challenge mounts through torque, not just raw weight, and that matches what happens in real setups: the screen may technically fit, then slowly tilt forward or drift after a few days.
When Reusing the Same Wall Holes Is Reasonable

If your old mount is still rated comfortably above the new monitor’s actual weight, the mount type has not changed, and the fasteners are still anchored into solid structure, reusing the same wall holes can be perfectly sensible. Wall integrity, rated hardware, and VESA compatibility matter just as much as display weight.
The best-case scenario is a fixed or short-reach wall mount attached to wood studs, concrete, or brick. One source notes that drywall, studs, and masonry each need different hardware, and heavier displays should favor stud attachment on drywall installations. That matches field reality: a fixed bracket carrying a 16 lb business monitor into a stud is a very different risk profile from a long articulating arm carrying a 22 lb curved ultrawide off the same wall.
A simple example makes this clearer. If your old 12 lb monitor used a fixed wall plate and your new one weighs 15 lb with the same VESA pattern, the same holes may be fine if the mount is still well within spec and the anchors are in good condition. If instead you are moving from a 15 lb flat panel to an 18 lb curved ultrawide on an articulating arm, the extra leverage can matter more than the extra 3 lb.
When Reusing the Same Holes Is a Bad Bet
The maximum load on the box is only the starting point. Real-world capacity drops when the wall is weaker than expected, the hardware is aging, or the arm creates more leverage than the original installation ever handled.
Reusing the same holes becomes risky when the new monitor is heavier by a meaningful margin, when the new screen is wider or more curved, when you are switching from fixed to full-motion, or when the old mount’s rating is unknown. Sources on mount capacity consistently note that fixed mounts generally tolerate more load than tilting or articulating designs because moving joints reduce effective capacity. For monitor buyers, that translates to a simple rule: the farther the screen can swing away from the wall, the less comfortable you should be running near the advertised limit.
There is also a useful difference in safety-margin advice. One source suggests choosing a mount rated about 20% to 30% above the total load in normal conditions, while another argues for a much more conservative real-world buffer, especially with motion and imperfect walls. Those views are not really contradictory; they assume different conditions. If you have a clean stud mount, modest screen weight, and a fixed bracket, the smaller margin may be workable. If you have a long arm, an older wall, a recessed VESA area, or any uncertainty about the old hardware, the conservative approach is the smarter one.
The Wall Matters More Than Most Buyers Think

Stud attachment is the strongest answer for drywall installations, and that principle carries over directly from TVs to heavier monitors. Many wall failures blamed on “bad mounts” are really bad anchoring decisions.
If the existing bracket is fastened into one or two studs, you have a solid base to evaluate. If it is only in drywall anchors, caution should go up immediately. Even if a lighter monitor held for years, the new one may add enough static load and forward pull to expose the weakness. That is especially true if you adjust the arm often, because dynamic load from moving the screen is harder on the hardware than a screen that never moves.
Watch for subtle warning signs before you trust the old holes. Sagging, creaking, hairline cracks near the plate, screws that never seem to tighten fully, or a monitor that slowly changes angle are all signs the system has lost safety margin. One source identifies those as warning symptoms, and they are worth taking seriously before you hang a more expensive display.
A Safer Upgrade Check in Plain English
The ergonomic payoff of a wall-mounted monitor is real when the mount lets you set the top of the screen at or slightly below eye level and keep it about an arm’s length away. Ergonomic monitor placement and KTC both support that target because it helps reduce neck strain and eye fatigue. But ergonomics only helps if the mount is stable enough to hold position.
Use this mental checklist while standing at the wall:
- Confirm the new monitor’s actual weight without the stand, then add any adapter plate, mini PC bracket, webcam bar, or other accessory that will live on the mount.
- Confirm the VESA pattern and the old mount’s weight rating from its label or manual rather than guessing by size.
- Confirm what the old holes are actually anchored into.
- Match the load to the mount type, remembering that a full-motion arm needs more headroom than a fixed plate.
A quick comparison helps:
Upgrade situation |
Reuse same wall holes? |
Similar weight, same fixed mount, stud-mounted, no damage |
Often yes |
Heavier monitor, but mount rating still has generous headroom and hardware is sound |
Maybe, after inspection |
Switching to an articulating arm or a curved ultrawide |
Usually re-evaluate and often re-mount |
Unknown mount rating or drywall-only anchors |
No |
Cracks, sag, loose hardware, or drift already visible |
No |
Torque Matters More With Ultrawides

Heavy ultrawides create more forward force on a mount because their center of gravity sits farther from the pivot. That is why a monitor arm that feels fine with a standard 27-inch office panel can become unstable with a 34-inch or 49-inch curved display. In practical terms, this is where the “same holes” question often stops being about the holes and starts being about the whole mechanical system.
If your new screen is a serious gaming ultrawide, a productivity super-ultrawide, or a portable smart display you plan to swing in and out frequently, prioritize stability over convenience. A stronger arm, a fresh stud-aligned install, and extra capacity cost less than a damaged monitor.
Make the Upgrade Feel Better, Not Just Fit
Good monitor placement should leave the top of the screen around eye level and the panel roughly an arm’s length away. Once the structural side is settled, that is where the comfort and productivity gains show up: less neck tilt, fewer glare problems, and a screen that stays where you put it.
If the old mount is properly rated, anchored into strong structure, and free of warning signs, reusing the same wall holes can be a reliable upgrade path. If any one of those pieces is uncertain, treat the new monitor like a new install rather than a shortcut. A heavier screen deserves fresh math, not old assumptions.


