


Place monitors so they support posture and visibility without pushing speakers, reflective screen surfaces, or fan noise into the microphone’s pickup path. The best setup keeps the screen at an ergonomic distance, the mic within about 12 inches of the speaker, speakers behind or away from the mic’s sensitive side, and hard reflections controlled.
Do remote teammates say your voice sounds hollow, sharp, or “roomy” even though your display setup looks clean? A practical placement pass can reduce echo, feedback risk, and fatigue without replacing the whole workstation. You’ll learn how to position the monitor, microphone, speakers, and room surfaces so video calls sound as polished as the screen looks.
Why Monitor Placement Affects Microphone Sound
A monitor is not just a visual surface. It is also a hard reflective panel, a physical obstruction, a possible fan or coil-noise source, and often the anchor point for webcams, soundbars, laptops, and USB microphones. When it sits too close to a microphone, angled toward glass, or paired with speakers firing across the desk, it can create short reflections that make speech sound boxy or smeared.
Room acoustics matter because microphones capture both direct voice and reflected sound. Conferencing-acoustics guidance notes that in meeting spaces, a large share of what reaches a microphone can be reflected sound, which is why room acoustics often matter more than software noise suppression. In practice, a 4K or 240 Hz monitor cannot compensate for a microphone hearing the wall, desk, and display before it hears the speaker clearly.
The goal is direct-to-reflected control. Your voice should arrive at the microphone first and strongest, while screen reflections, HVAC noise, keyboard taps, and speaker playback stay lower in level. That is the difference between a meeting setup that merely works and one that feels present, confident, and easy to listen to.
Start With Ergonomics, Then Tune the Audio
A monitor still has to serve the body first. Ergonomic workstation guidance recommends placing the display directly in front of the user, about an arm’s length away, with the top of the screen at or slightly below eye level; this monitor distance helps reduce neck strain while keeping the screen readable. For most desks, that means roughly 20 to 40 inches from the eyes.
Workstation safety guidance warns that a monitor placed too high can make users tilt the head back, increasing strain; this neutral posture principle also helps audio because it prevents the speaker from leaning forward, backing away, or twisting off-mic during calls. A well-placed display keeps your mouth in a predictable relationship to the microphone.
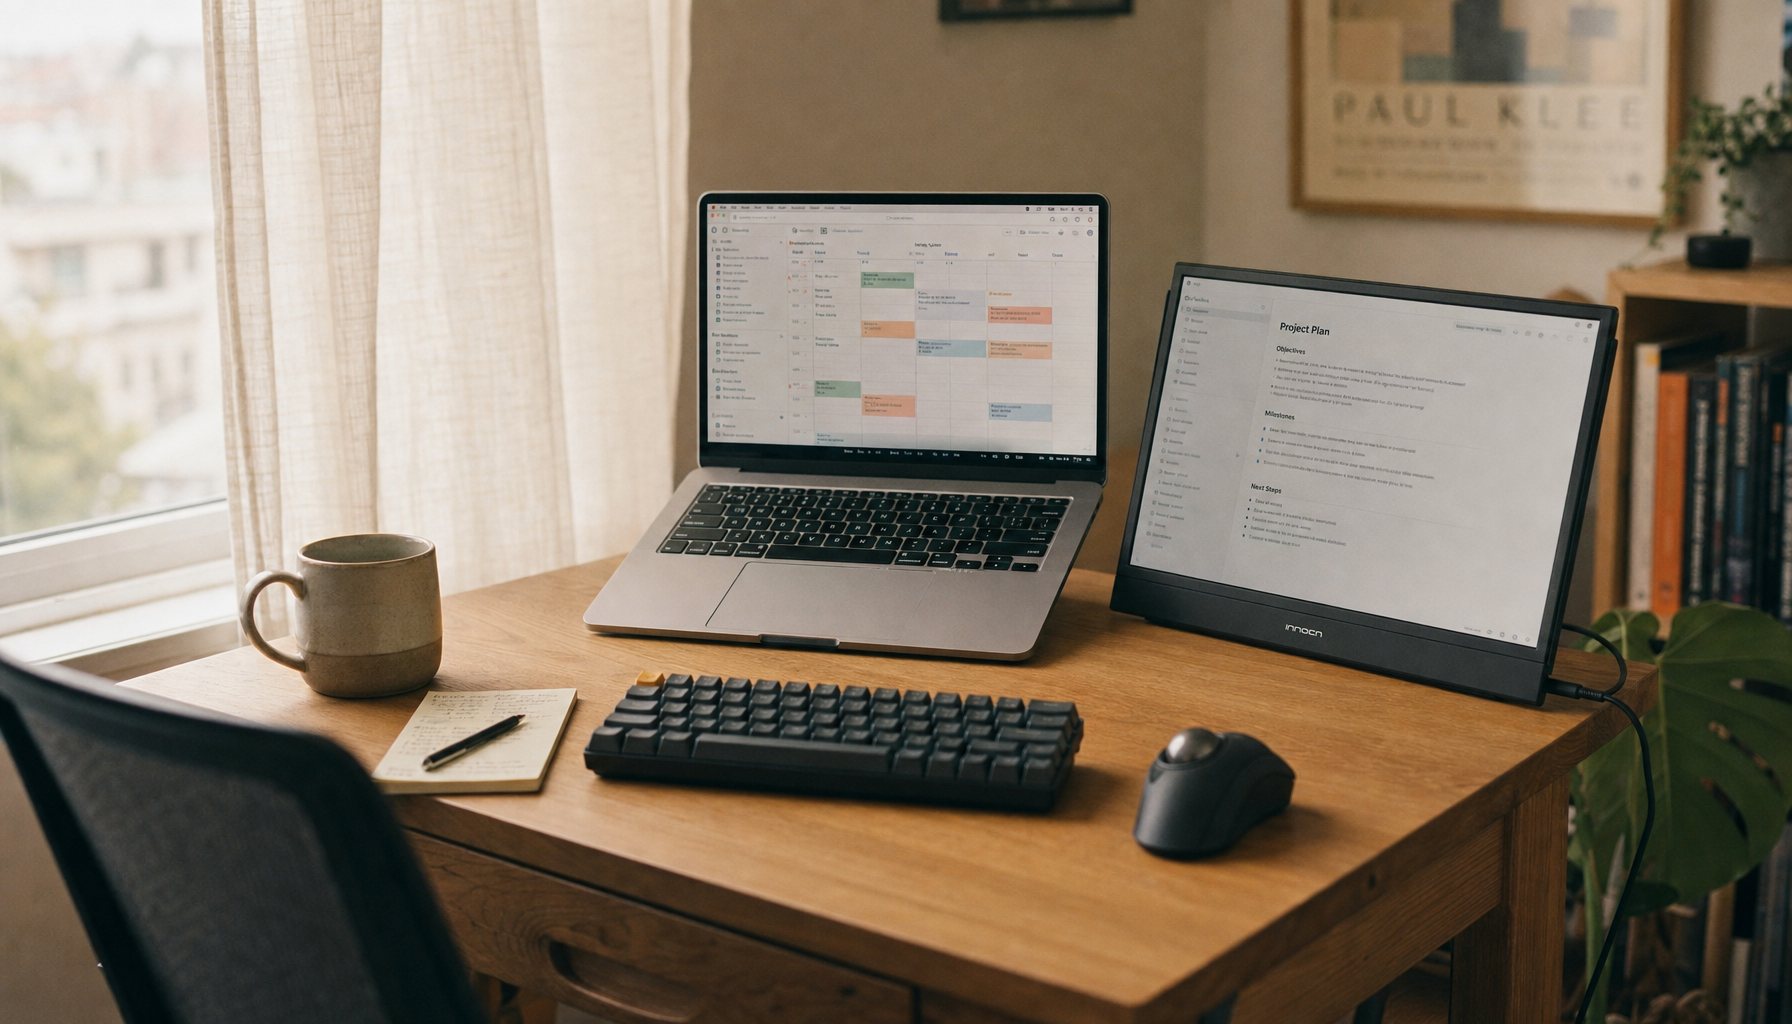
For a real desk example, imagine a 27-inch office monitor on an arm, a USB cardioid microphone on a short boom, and a webcam centered above the screen. Put the monitor straight ahead at arm’s length, then bring the microphone from the side so it sits just outside the camera frame and within about 8 to 12 inches of your mouth. That keeps your eyes on the screen, your neck neutral, and your voice strong enough that the mic does not need excessive gain.

Keep the Microphone Close, But Not Blocked by the Display
A common mistake is placing the microphone behind the monitor because it looks tidy. That usually forces the microphone to hear reflections off the display and desk before it captures direct speech. It can also place the monitor body between your mouth and the capsule, which weakens clarity.
Conferencing guidance recommends speaking into a microphone from no more than 12 inches away for clear voice quality, and that microphone distance is a useful target for monitor-heavy desks. If the microphone must sit below the screen, raise it above keyboard height and angle it toward the mouth. If it sits beside the display, keep the capsule forward of the screen plane rather than tucked behind the bezel.
The tradeoff is visual cleanliness versus acoustic performance. A hidden mic looks better on camera but often needs more gain, which pulls in room noise. A small boom arm or low-profile desktop stand may be more visible, but it lets the mic run at lower gain and capture a fuller voice. For performance-driven setups, voice quality usually wins.
Watch the Screen as a Reflective Surface

Modern monitors are large, flat, and acoustically reflective. A glossy 32-inch display or dual-monitor wall can bounce voice energy toward the microphone, especially when the mic is centered directly in front of the screen. This reflection arrives milliseconds after the direct voice and can create a comb-filtered, hollow tone.
Conference-room acoustic guidance consistently points to reverberation control as a speech clarity issue. One conferencing resource describes RT60 as the time it takes sound to decay after a clap and recommends conference rooms aim for about 0.4 to 0.6 seconds; excessive reverberation time makes speech muddy for people in the room and remote listeners. In a home office, you may not measure RT60 formally, but a clap that lingers or pings around the desk is a warning sign.
The simplest correction is angle and absorption. Slightly toe the monitor so it does not reflect your voice straight back into the mic, especially with side-address microphones. Add absorption behind or beside the monitor if a bare wall or window sits directly behind it. A thick curtain, fabric panel, bookshelf, or purpose-built wall panel can reduce the hard bounce without making the room visually heavy.
Setup Choice |
Acoustic Advantage |
Tradeoff |
Mic beside the monitor and forward of the screen |
Strong direct voice, fewer display reflections |
Requires a boom or visible stand |
Mic behind the monitor |
Cleaner desktop appearance |
Lower voice level and more reflected sound |
Speakers behind the mic pickup rejection area |
Lower echo and feedback risk |
May require repositioning or stands |
Monitor angled away from the mic reflection path |
Less hollow coloration |
Slight adjustment to viewing angle |
Separate Speaker Sound From Microphone Pickup

If your monitor includes speakers, or if desktop speakers sit beside the display, speaker-to-mic leakage becomes a central concern. The microphone hears the remote participant’s voice from the speakers, then sends it back into the call. Conferencing software can suppress some echo, but placement is still the first line of defense.
Conferencing setup guidance recommends placing speakers behind the microphone when possible so speaker sound reaches the rear of the mic, where many directional microphones reject more sound; this speaker placement reduces echo and improves clarity. In practical terms, do not aim speakers across the desk into the front of a USB microphone. Raise speakers above the work surface when possible, keep them at least 2 ft from walls or corners, and aim them at the listener rather than at the mic.
Live sound practice uses the same principle in a more demanding environment. Feedback guidance emphasizes solving feedback with placement before reaching for EQ, because physical placement is often the root cause. Stage-monitor guidance makes the point more precisely: aim sound sources toward a microphone’s null point, the angle where it rejects sound most strongly, because maximum rejection can materially increase stability before feedback.
For video conferencing, that means knowing your mic pattern. A cardioid microphone usually rejects sound most strongly from the rear, so place speakers generally behind the microphone, not in front of it. Hypercardioid and supercardioid microphones can reject more from angled rear-side zones, but they may pick up some sound directly behind them. If the product sheet shows a polar pattern, use it; generic labels are a starting point, not a guarantee.
Control Noise Floor Around the Display
Monitor placement also affects what noise sits near the microphone. Laptops, docking stations, mini PCs, monitor power bricks, HVAC vents, and LED lighting can add hum, hiss, or fan noise. A microphone mounted near the display may capture that noise more clearly than the user does.
Conference-room guidance defines noise floor as the background sound in an otherwise quiet room and recommends keeping an ideal conference room below 35 dBA; a high noise floor reduces speech clarity and distracts remote participants. Another conferencing recommendation gives a similar practical ceiling, advising room noise at or below 40 dB NC.
A quick test is simple. Join a test call, stop speaking, and watch the input meter while the room is quiet. If the meter moves when your monitor brightness changes, fans ramp up, or an HVAC vent turns on, the microphone is too close to a noise source or its gain is too high. Move the mic closer to your mouth, move noisy gear farther away, or rotate the mic so its rejection side faces the noise.
Treat the Room, Not Just the Desk

Desk placement solves only part of the problem. Bare walls, glass boards, hard floors, and windows can turn a sharp display setup into an echo chamber. Conference-room soundproofing guidance notes that video conferencing rooms should treat the wall behind the camera, add ceiling treatment above the table, and avoid untreated glass walls; these video conferencing rooms need absorption where speech reflections concentrate.
For a small office, start with the surfaces closest to the monitor and microphone. If the display faces a bare wall, add absorption behind the user or behind the monitor depending on where reflections are strongest. If the microphone sits on a hard desk, use a desk mat or mic arm to reduce vibration and early reflections. If the setup faces a window, use blinds or curtains to reduce both glare and acoustic brightness.
There is a limit. Over-treating a room can make it sound unnaturally dead, while under-treating leaves speech harsh and tiring. The practical target is not a recording studio; it is a room where speech is easy to understand, remote listeners do not strain, and the display remains comfortable for long work sessions.
Practical Placement Blueprint
For a single-user productivity or gaming desk, place the monitor directly in front of you at arm’s length, with the top edge at or slightly below eye level. Ergonomic guidance recommends keeping the monitor directly in front and at least an arm’s length away, while also controlling glare; this screen glare advice matters because users often lean, twist, or raise their voice when the screen is uncomfortable to view.
Mount the microphone so the capsule sits 8 to 12 inches from your mouth, slightly off to one side, and forward of the monitor face. Keep speakers lower in level, aimed at your ears, and placed where the microphone rejects them. If you use the monitor’s built-in speakers, lower their volume and rely on echo cancellation only as backup. For critical calls, headphones or a headset remain the most reliable way to break the speaker-to-mic loop.
For a conference room display, avoid putting microphones directly under wall-mounted screens on a hard table without treatment. Ceiling arrays or table mics should be positioned away from HVAC vents and large reflective surfaces, while the screen wall and ceiling above the table should receive acoustic attention. Court video conference etiquette material also reinforces a practical behavior layer: clear audio depends on disciplined speaking habits and appropriate conferencing setup, not hardware alone; good video conference etiquette supports the acoustic design.
FAQ
Should the microphone go above or below the monitor?
Either can work, but the capsule should have a clear path to your mouth and should not sit behind the display. Above-monitor placement can sound clear if the mic is close enough and angled down, while below-monitor placement works when the mic is raised off the desk and kept away from keyboard noise.
Are headphones better than speakers for video conferences?
Headphones are usually better for acoustic control because they prevent speaker audio from re-entering the microphone. Speakers feel more natural in shared rooms, but they require careful placement, lower volume, and a microphone pattern that rejects speaker sound.
Do noise-canceling apps fix poor monitor and mic placement?
They help, but they cannot fully restore speech that is already weak, reflected, or masked by room noise. Placement, distance, and room treatment should come first; software cleanup should be the final layer.
A high-performance display setup should look sharp and sound intentional. Put the screen where your body works naturally, put the microphone where your voice arrives first, and keep speakers, walls, and hard surfaces from competing with the message.


