


Vertical stacking with an above-screen portable display can transform a cramped hotel desk or small apartment workspace into an efficient multi-monitor command center, but only if you respect strict weight, tilt, and stability limits to avoid neck strain or equipment damage.
The key decision is matching your portable monitor's weight to the right mounting hardware while keeping the top of your primary screen at or slightly below eye level and angling the upper screen downward. Light models under roughly 1.5 kg often work with laptop clips or travel tripods, while heavier 5 kg+ units demand independent heavy-duty stands. This guide walks through when the setup makes sense, the hardware thresholds that keep it safe, and the practical checks that prevent common regrets.

Why Vertical Stacking is the Solution for Compact Desks and Travel
Horizontal side-by-side monitors eat precious desk depth that many travel setups and small apartments simply lack. Stacking a lightweight portable display directly above your laptop or primary monitor reclaims that space while delivering quick-glance reference material such as Slack threads, documentation, or dashboards.
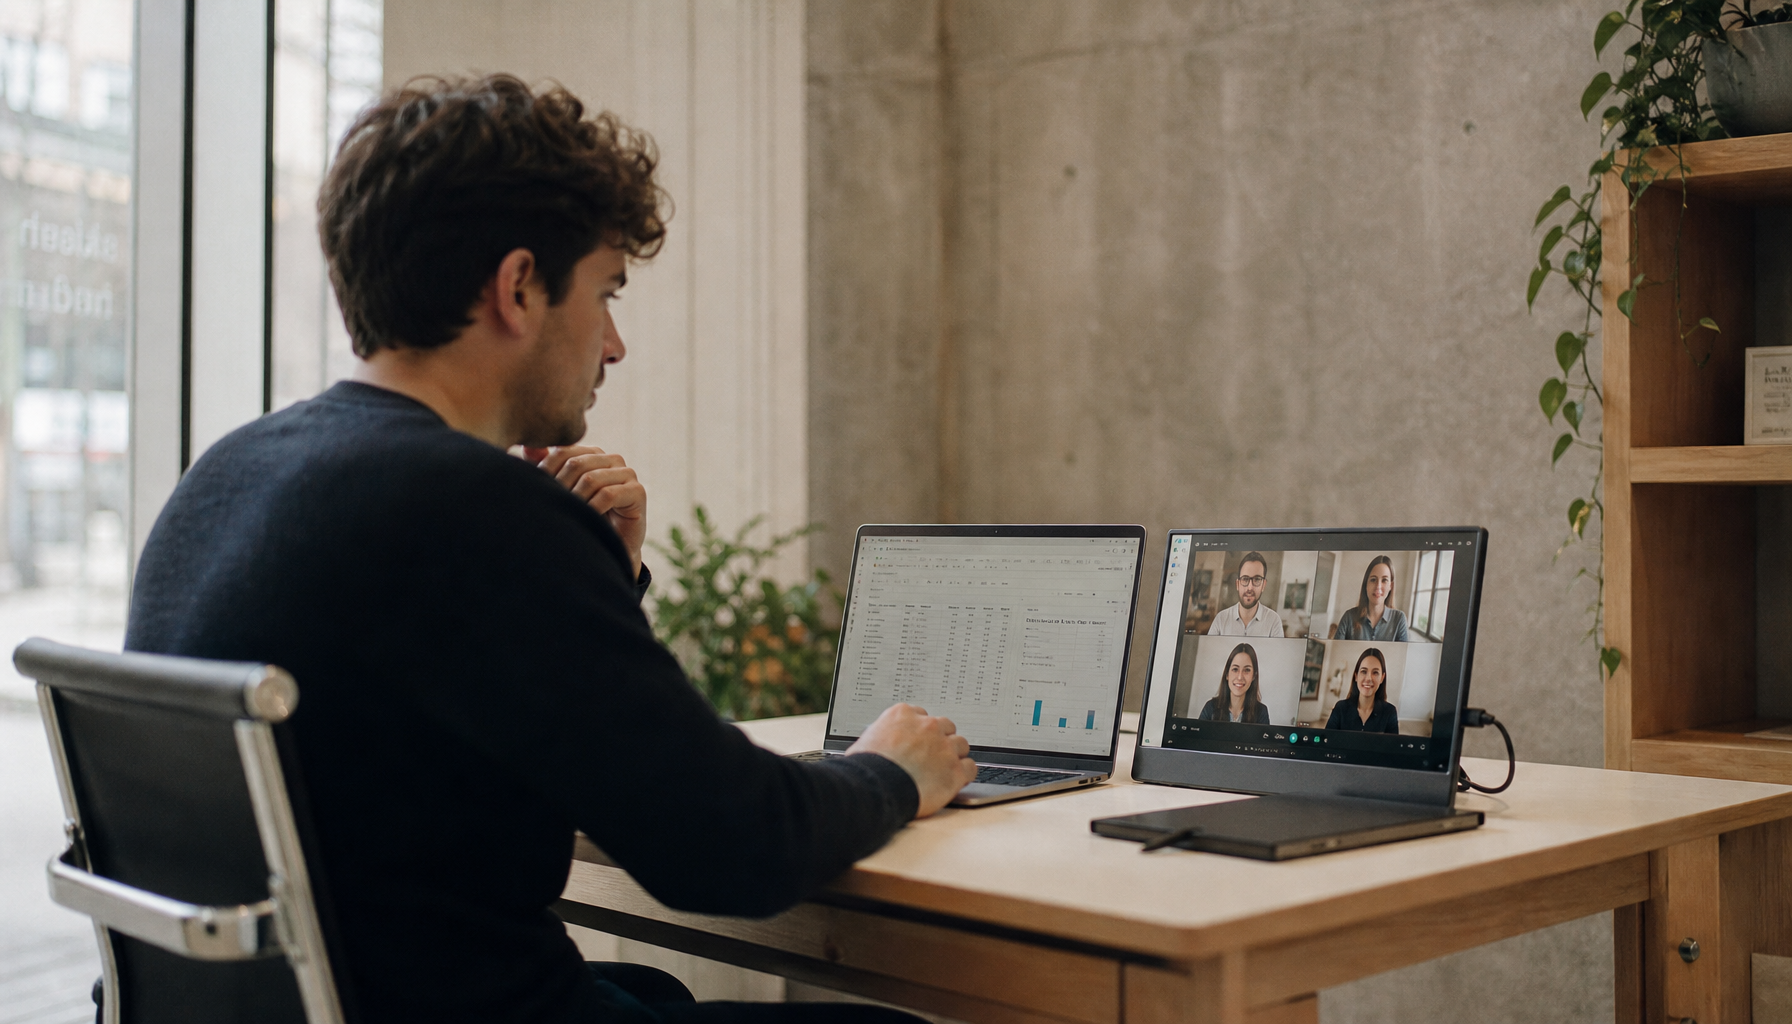
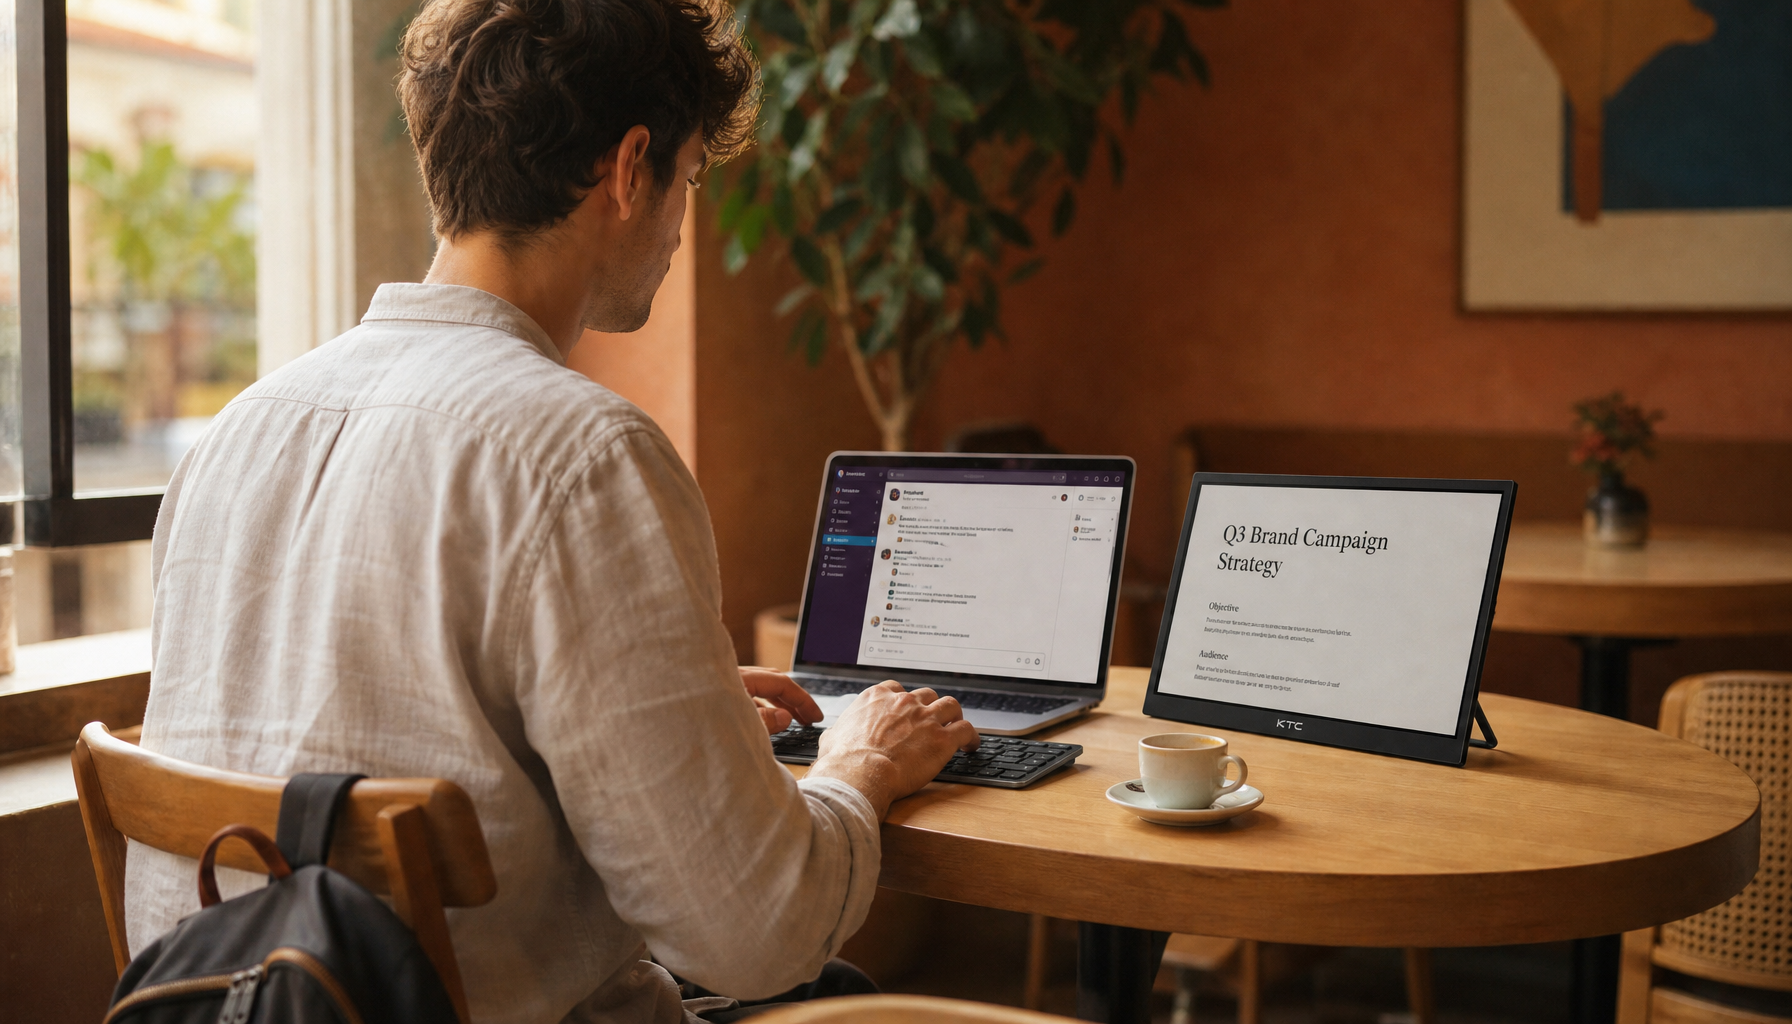
For digital nomads and remote workers, this creates a compact “command center” feel without dragging a full-size second monitor. A portable monitor like the KTC H15F9, weighing under 1 kg, slips easily into a travel bag and mounts quickly on a tripod or clip for hotel desks or coffee-shop tables. The vertical layout keeps your primary workspace focused while the upper screen handles secondary tasks.
That said, this configuration is not ideal for everyone. If your workflow requires frequent side-to-side eye movement or you regularly use the second screen for long typing sessions, a horizontal dual-monitor setup may reduce neck strain more effectively. Vertical stacking shines when the top display stays reserved for glanceable content and your primary surface remains uncluttered.
Choosing the Right Mounting Hardware: Weight and Stability First
The single most important variable is display weight. Laptop hinges generally tolerate no more than about 1.5 kg before risking accelerated wear or sagging; even the light KTC H15F9 adds leverage that can stress some hinges over time. Heavier models such as the KTC MEGAPAD 25 at 5.5 kg create significant tipping forces and must never attach to a laptop lid or lightweight travel tripod.
For travel-friendly setups, carbon-fiber tripods paired with VESA adapters or magnetic clips work well for sub-1.5 kg portables, provided the base spreads wide enough for stability. On compact desks, test for top-heaviness by gently bumping the table edge—if the assembly rocks, add a counterweight or switch to a heavier C-clamp with a reinforced backing plate. Hollow-core desks like many IKEA models often need extra support plates to handle clamp pressure without damage.
This chart clarifies the practical thresholds:
Portable Monitor Mount Safety by Display Weight
Use this chart as a rough decision guide: lighter portable displays can usually work with clips or travel tripods, while heavier units need floor stands or heavy clamping. Stability is especially important on narrow desks, soft desks, and any setup with a raised center of mass. Do not treat the tiers as exact load-test limits.
View chart data
| Category | H15F9 (light) | Megapad 25 (heavy) |
|---|---|---|
| Laptop clip | 3.0 | 1.0 |
| Travel tripod | 2.0 | 1.0 |
| Heavy C-clamp | 1.0 | 3.0 |
| Floor stand | 1.0 | 3.0 |
Non-VESA portable monitors can still mount using universal adapter kits that create a standard 75×75 mm or 100×100 mm interface. Always verify the adapter's rated load exceeds your display weight with a safety margin. For the KTC H15F9, a simple tripod with magnetic attachment often suffices; heavier MEGAPAD models shift you toward studio-grade grip equipment or floor-standing poles.
Ergonomics of the Vertical Stack: Protecting Your Neck and Eyes
Proper height and tilt matter more in a vertical stack than in side-by-side layouts because upward gaze quickly causes neck extension. OSHA guidance recommends positioning the top edge of your primary monitor at or slightly below eye level so you look down slightly rather than up. The upper screen must then tilt downward 15–30 degrees so its content falls within natural eye movement instead of forcing repeated neck craning.
Viewing distance should stay roughly consistent at 20–40 inches for both screens to limit focal fatigue, according to the Occupational Health Clinics for Ontario Workers reference guide. In practice this means placing the upper monitor a few inches farther back or raising your chair slightly if the stack pushes the top screen beyond comfortable reach.
Many users discover “tech neck” after weeks of upward glancing at an untilted secondary screen. The fix is simple: choose mounting hardware that supports at least 15 degrees of downward tilt and test the setup by reading text on the upper display for ten minutes—if you feel tension in the back of your neck, readjust the angle or lower the entire assembly.

Optimizing Your Vertical Workflow: Software and Settings
Hardware alone does not deliver productivity gains; operating-system alignment and window management determine whether the vertical gap feels seamless or frustrating. Align virtual displays in Windows or macOS to match your dominant-hand cursor path rather than centering them perfectly. Right-handed users often benefit from placing the upper screen slightly offset so the mouse travels naturally upward without snagging on the physical bezel.
Increase UI scaling on the top monitor by 10–15 % to compensate for its greater viewing distance; otherwise text appears smaller and invites leaning forward. Tools such as Windows Snap Layouts or macOS Stage Manager help confine active windows to the bottom half of the upper screen, keeping important content inside the ergonomic sweet spot and reducing upward neck movement.
Reserve the top display for reference material—documentation, chat windows, or system monitors—rather than primary editing tasks. This heuristic, echoed across ergonomic studies, prevents prolonged upward gaze that defeats the purpose of the stacked layout. For coders and analysts who frequently reference material, the vertical workflow can boost efficiency once these software adjustments become habit.
If you want deeper guidance on multi-monitor ergonomics, see our article on Vertical vs. Horizontal: How to Build the Ultimate Dual Monitor Productivity Setup.
Safety Checklist: Validating Your Above-Screen Setup
Before committing to daily use, run these four quick checks that catch most failures early:
- Does the laptop hinge show any sag once the portable monitor is attached? If yes, immediately switch to a tripod or independent stand.
- Is the upper screen tilted at least 15° downward toward your eyes? Measure roughly with a phone level app if needed.
- Do the cables have enough slack for full range of motion without tugging on ports? High-quality, flexible USB-C cables reduce strain in tight travel setups.
- Does the entire assembly remain stable when you type quickly or accidentally bump the desk? Add a wider base or counterweight if it rocks.
Additional practical steps include verifying desk material thickness for clamp compatibility, keeping the center of mass as low as possible, and using a travel bag that protects both the monitor and mounting hardware. For heavier MEGAPAD models, consider a rolling floor stand rather than any desk-mounted solution to eliminate tipping risk entirely.
Our guide on mounting monitor arms to glass desks offers related stability insights that apply to portable setups on delicate surfaces. When in doubt, err toward overbuilt support—replacing a damaged hinge or desk costs far more than choosing the correct mount upfront.
Frequently Asked Questions
Can I Mount a Portable Monitor Directly on My Laptop Lid?
Only if the portable display weighs well under 1.5 kg and your laptop model has reinforced hinges. Most consumer laptops experience accelerated wear from the added leverage, so a separate tripod or stand is usually safer and more stable for daily travel use.
What Is the Ideal Tilt Angle for an Above-Screen Monitor?
Aim for 15–30 degrees downward from vertical. This angle lets you view the upper content with eye movement rather than neck extension, aligning with standard ergonomic recommendations and dramatically reducing strain during long work sessions.
Which Portable Monitors Work Best for Above-Screen Stacking?
Lightweight 15–16 inch models such as the KTC 15.6" FHD HDMI Portable Travel Monitor with Built-in Speakers H15F9 are easiest to mount safely. Larger touch models like the MEGAPAD series require heavier-duty independent stands and are better suited to semi-permanent compact desks than true travel workflows.
How Do I Prevent Cable Strain in a Vertical Travel Setup?
Choose short, flexible USB-C cables rated for frequent flexing and route them with gentle loops that allow the monitor to move without pulling on ports. Many travelers also carry a spare high-quality cable in their portable monitor travel bag to avoid single-point failures on the road.
Is This Setup Suitable for Glass or Hollow-Core Desks?
It can be, but only with proper reinforcement. Glass desks risk cracking under clamp pressure, and hollow-core surfaces may sag or dent. Use wide backing plates or switch to a floor-standing tripod for these surfaces. Our article on mounting to glass desks details additional precautions.
Should the Top Screen Match the Primary Monitor’s Resolution and Scaling?
Not necessarily. Increasing scaling 10–15 % on the upper display often improves readability at its greater distance. The most important factor is aligning the virtual displays to your natural mouse movement so the pointer does not catch on edges during daily use.


